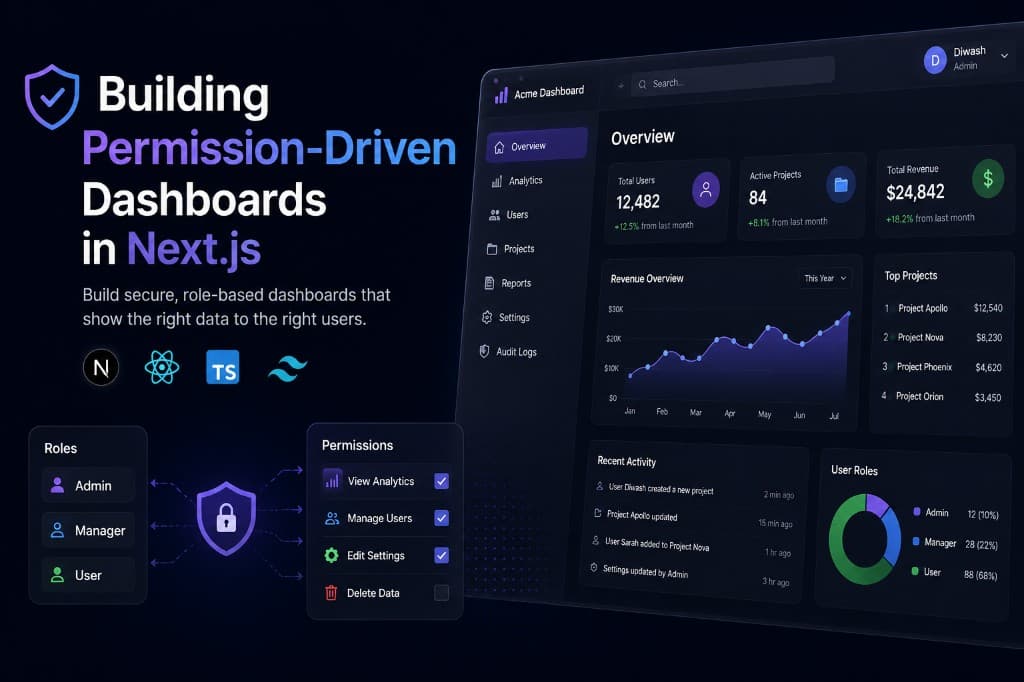
Most dashboard bugs I see in production are not styling issues. They are access issues: a button that should not exist for a coach, a route that still loads for a subscriber, or a sidebar that shows actions the API will reject.
If you build SaaS products with multiple roles — admin, owner, staff, creator, subscriber — a permission-driven dashboard is not optional. It is the product.
This article covers how I approach permission-driven dashboards in Next.js, React, and TypeScript: the access model, UI composition, server vs client boundaries, and the trade-offs that show up once real roles enter the system.
The problem with role-only UI
A common first implementation looks like this:
1if (user.role === "admin") {
2return <AdminSidebar />;
3}
4
5if (user.role === "coach") {
6return <CoachSidebar />;
7}
8
9return <SubscriberSidebar />;
This works until the product grows.
Then you get requests like:
- coaches can upload content, but only approved coaches can publish
- gym staff can view members, but only managers can refund payments
- content creators can submit drills, but cannot edit catalog taxonomy
Suddenly role === "coach" is not enough. You need permissions, and the UI
must resolve from those permissions — not from a hardcoded role tree.
Why this matters in real products
Permission mistakes create three kinds of cost:
- Security gaps — hidden buttons are not security. Users still hit APIs.
- Support load — users see actions they cannot complete, then file tickets.
- Rewrite pressure — role-only conditionals become unmaintainable as features multiply.
In multi-tenant products especially, the same screen can mean different things for a platform admin, a tenant owner, and a limited staff user. The dashboard has to compose around capabilities.
Core model: roles, permissions, and resources
I keep three concepts separate:
Roles
A role is a named bundle of permissions. Examples: superadmin, gym_owner,
coach, content_creator.
Roles are for assignment. They are not the source of truth for rendering.
Permissions
A permission is a capability string, preferably stable and boring:
members:readmembers:writepayments:refundcontent:approvesettings:billing
Permissions are what the UI and API both check.
Resources (optional but useful)
Some permissions only make sense in context:
- can refund this gym's payment
- can edit this branch's staff
That is resource scoping. Multi-tenant apps almost always need it.
A practical permission shape in TypeScript
Keep the client model small and explicit:
1type Permission =
2| "members:read"
3| "members:write"
4| "payments:refund"
5| "content:submit"
6| "content:approve"
7| "settings:billing";
8
9interface AccessContext {
10role: string;
11permissions: readonly Permission[];
12tenantId?: string;
13}
14
15const can = (access: AccessContext, permission: Permission) =>
16access.permissions.includes(permission);
I prefer string unions early. When the permission catalog grows, move it to a shared package used by both frontend and backend so the names cannot drift.
Resolve UI from permissions, not role branches
Instead of separate dashboards per role, compose one shell and let permissions decide what appears.
Sidebar example
1const NAV_ITEMS = [
2{
3  label: "Members",
4  href: "/dashboard/members",
5  permission: "members:read",
6},
7{
8  label: "Refunds",
9  href: "/dashboard/refunds",
10  permission: "payments:refund",
11},
12{
13  label: "Content review",
14  href: "/dashboard/content/review",
15  permission: "content:approve",
16},
17] as const;
18
19export function DashboardNav({ access }: { access: AccessContext }) {
20const items = NAV_ITEMS.filter((item) => can(access, item.permission));
21
22return (
23
24<nav>
25{items.map((item) => (
26<a href={item.href} key={item.href}>
27{item.label}
28</a>
29))}
30</nav>
31);
32}
The same pattern works for page actions, table row menus, and settings tabs.
When a new permission is added, you update the catalog and the places that need
it — not a growing forest of if (role === ...).
Protect routes on the server
UI hiding is not authorization.
In the App Router, enforce access before rendering sensitive pages:
1import { redirect } from "next/navigation";
2
3import { getAccessContext } from "@/lib/auth/access";
4
5export default async function RefundsPage() {
6const access = await getAccessContext();
7
8if (!access.permissions.includes("payments:refund")) {
9redirect("/dashboard");
10}
11
12return <RefundsView />;
13}
And enforce the same permission again in the mutation/API layer. Frontend checks improve UX. Backend checks protect data.
If you use NestJS or Node services behind the dashboard, mirror the permission names there. Divergent permission vocabularies are a common source of subtle bugs.
Feature flags vs permissions
These get mixed up often.
- Permissions answer: is this user allowed to do this?
- Feature flags answer: is this feature available in this environment/tenant plan?
A user can have payments:refund permission and still not see refunds if the
tenant plan does not include billing tools. Model both explicitly:
1const canRefund = (access: AccessContext, flags: { billingEnabled: boolean }) =>
2flags.billingEnabled && can(access, "payments:refund");
Do not overload permissions to also mean product packaging. That becomes painful when the same role exists across differently billed tenants.
Where to load access context in Next.js
A pattern that stays maintainable:
- Authenticate the session on the server.
- Load role + permissions + tenant scope once per request.
- Pass a serializable access object into client islands that need it.
- Keep privileged decisions in Server Components, route handlers, or backend APIs.
Avoid fetching permissions independently inside every client widget. You will get loading flicker and inconsistent menus.
For client interactivity (dropdowns, modals), pass the already-resolved permissions as props or through a narrow provider. The provider should not become a second auth system.
Designing for multi-tenant dashboards
In multi-tenant SaaS, always ask:
- Is this permission global or tenant-scoped?
- Can a platform admin impersonate or operate across tenants?
- Are IDs in the URL authorized against the active tenant?
A frequent bug is checking payments:refund and forgetting to verify the payment
belongs to the active tenant. Permission without resource scope is incomplete in
multi-tenant systems.
Practical rule:
- UI: filter by permission
- API: verify permission and tenant/resource ownership
Trade-offs
One composed dashboard vs separate apps
One dashboard shell is usually better when roles share most of the domain language and screens.
Separate apps can make sense when audiences and release cycles are truly different — for example, a consumer-facing subscriber app versus an internal admin console. Even then, share the permission vocabulary.
Fine-grained permissions vs coarse roles
Fine-grained permissions are flexible and testable. They also create catalog noise if every button gets its own permission.
Start coarser (content:manage) and split only when product rules force a split
(content:submit vs content:approve).
Client-only gating
Fast to ship. Unsafe as a security boundary. Use it for presentation only.
Common mistakes
- Role switches everywhere — unreadable and brittle.
- Different permission names on frontend and backend — silent authorization bugs.
- Hiding buttons without API checks — false sense of safety.
- Putting tenant IDs only in localStorage — easy to tamper; validate server-side.
- Over-fetching a mega user object on every navigation — cache thoughtfully, invalidate on role changes.
- No audit trail for elevated actions — refunds, approvals, and permission grants should be observable.
Practical recommendations
- Define permissions as a shared contract early.
- Render navigation and actions from permission maps.
- Enforce the same checks in Next.js server routes and backend services.
- Separate plan/feature availability from user permissions.
- In multi-tenant products, always pair permission checks with resource scope.
- Add tests for “can see” and “cannot see” per role fixture — UI and API.
- Prefer boring permission names over clever ones.
If you maintain NestJS services behind the dashboard, treat guards/interceptors as the source of truth and keep the Next.js layer aligned with those rules.
Conclusion
Permission-driven dashboards are less about fancy UI and more about a clear access model. Roles assign. Permissions authorize. The interface composes.
In Next.js, that means resolving access on the server, composing React UI from capabilities, and never trusting the client as the final gate.
Get the permission model right early, and new features become additive. Get it wrong, and every new role becomes a rewrite.
If you are building multi-tenant SaaS with React, Next.js, and TypeScript, invest in the access layer the same way you invest in your domain model. The dashboard is where users feel whether that investment worked.